Brick is a popular building material due to its durability, cost-effectiveness, and aesthetic value. However, bricks can become cracked due to weather conditions or poor installation. Cracked bricks can present structural issues and aesthetic challenges that need to be addressed. In this article, the process of repairing a cracked brick will be discussed in detail.
The first step when addressing a crack in a brick is to assess the severity of the issue. If the crack is small and does not affect the structural integrity of the brick, then it may only require cosmetic repair. On the other hand, if there is significant damage to the brick or if it has begun to crumble, then it may need to be replaced entirely.
Finally, repairs of any kind should only be attempted by experienced professionals for safety reasons. Knowing how to properly repair a cracked brick requires expertise and knowledge of proper techniques and materials. This article will provide an overview of how to properly repair cracked bricks in order to ensure that it is done safely and correctly.
Assessing The Damage
Assessing the damage to a cracked brick is necessary in order to determine the best course of action for repair. A visual inspection should be conducted to gauge the severity of the crack and establish whether or not any additional damage is present. It is important to inspect the surrounding bricks as well, since cracks can spread quickly and may indicate structural issues with the wall or foundation. If there are signs of water infiltration, like efflorescence, mold, or mildew, further investigation and potential repairs may be necessary. Additionally, if the brick has separated from its mortar joint, then it will need to be reset. Once an assessment is complete, then the appropriate repair plan can be determined.
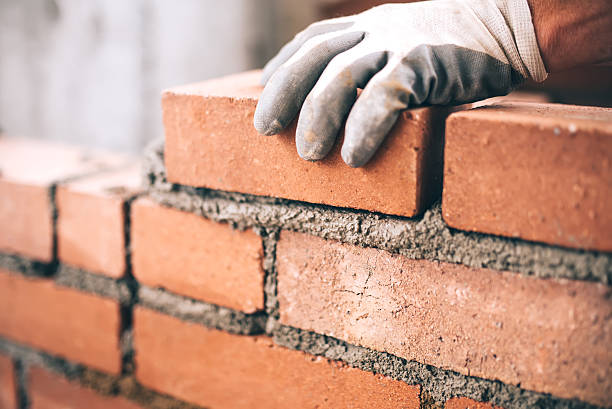
Gathering Supplies
Repairing a cracked brick requires gathering supplies. It is important to obtain the right materials, as this will ensure that the repair is successful and lasting.
The following supplies are necessary:
– Mortar mix
– Brick chisel
– Hammer
– Trowel
These tools allow for removal of old mortar and setting in new mortar. The trowel should be used for smoothing out the mortar once it has been applied. Additionally, it is helpful to have a utility knife or other sharp blade for cutting away any excess material.
Gathering these tools will help make the repair process easier and more efficient. It is also beneficial to have some protective gear such as gloves or eyewear when performing repairs of this kind, to avoid injury from dust or particles.
Removing Crumbled Mortar
Once the necessary supplies have been gathered, the next step in repairing a cracked brick is to remove any crumbled mortar. To do this, a chisel and hammer should be used to chip away at the mortar. Careful attention must be taken not to damage the adjacent bricks or wall surface during this process. A vacuum with a hose attachment can be used to suction away any debris created by chiseling. Once all of the crumbled mortar has been removed, a scrub brush and water can be used to clean off any remaining debris and residue from the surface of the brick and surrounding area. The surface should be completely dry before beginning repairs in order to ensure that no further damage is done when applying new mortar or adhesive.
Cutting Away Damaged Brick
Removing damaged brick is an essential part of repairing a cracked brick. To do this, the first step is to ensure that the area around the damaged brick is clear and free from debris. A chisel should be used to cut away any mortar that is adhered to the brick. The next step is to gently tap the damaged brick with a hammer until it loosens and can be removed. In some cases, a cold chisel may also be required for harder bricks. If the damaged brick cannot be removed easily, it may need to be scored with a masonry saw or drill before being tapped out. It is important to take care when cutting and tapping bricks as they are fragile and can easily break. Once all of the damaged material has been removed, the area must then be cleaned up in preparation for repairing or replacing the brick.